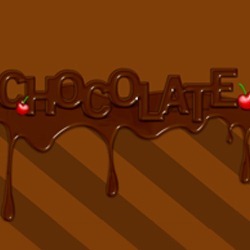
Learn how to create a 'Chocolatey Goodness' text effect in Illustrator and Photoshop. You'll learn the benefits of the burn and dodge tool while experimenting with Layer Styles.
Preview of Final Results
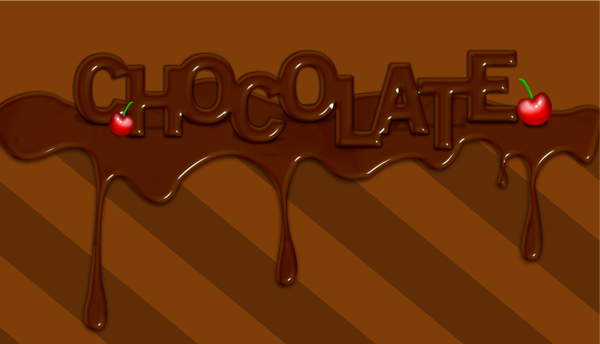
Download the PSD
Chocolatey Goodness.zip | 1 MBChocolatey Goodness Photoshop Tutorial
Resources
- Old Sans Black - DaFont
- Water Pattern - deviantArt (bad-girl)
Step 1 - Create a New Document
Choose File > New or press Ctrl/Command + N. The size of my canvas is 1600px (width) x 916px (height) but choose any size you wish.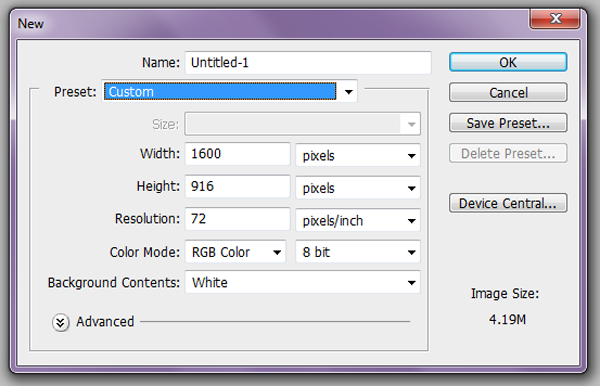
Step 2 - Background
Grab the Paint Bucket Tool, pick #7f3e08 brown color and fill the background.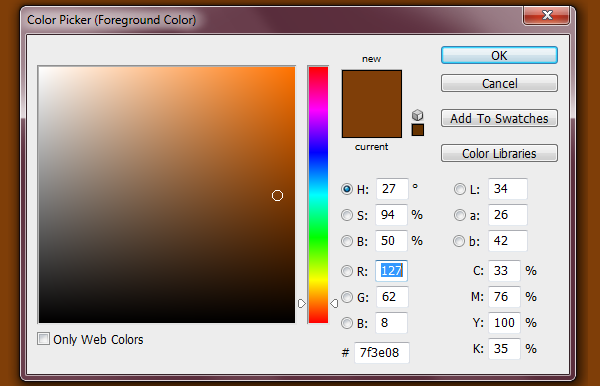
Step 3 - Stripes
Create a new layer name it 'Stripes'. Grab your Rectangular Marquee Tool, draw out a long rectangular shape. After that fill it with #602e06 (Edit > Fill > Color).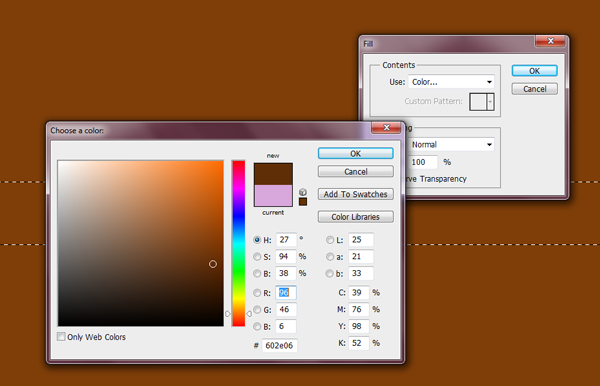
Step 4 - Duplicate
Once you've filled the rectangle, duplicate the 'Stripes' layer (right click 'Stripes' layer and click 'Duplicate Layer', click 'ok'). Repeat this step as need be, so that it looks like mine. Once it looks like my image merge all of the stripe layers.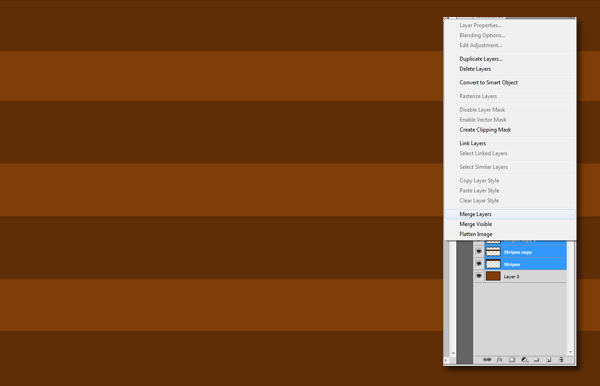
Step 5 - Rotate
Rotate your 'Stripes' Layer (Edit > Free Transform or 'ctrl T') I rotated mines to 39 degrees. Duplicate this 'Stripe' layer again and place it next to your first 'Stripe' layer. Merge both layers. Grab your Rectangular Marquee Tool and make another rectangular shape that covers a little bit less than half of the canvas and press 'delete'.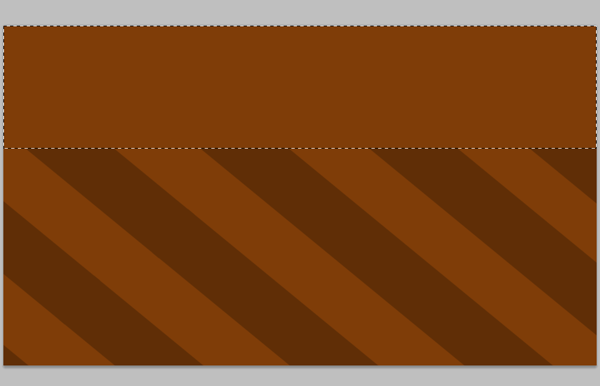
Step 6 - Illustrator
Fire up Adobe Illustrator. Create the same size canvas as the one you made in Photoshop (File > New) 1600px X 916px.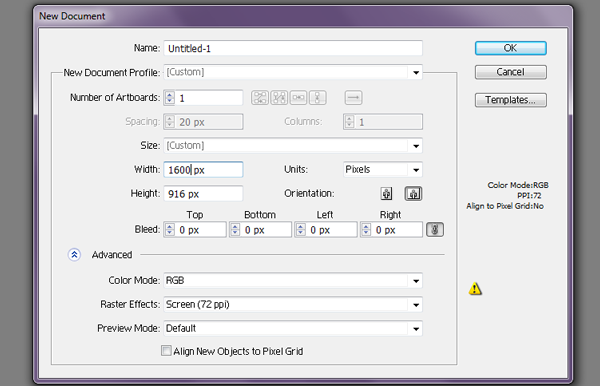
Step 7 - Chocolate Drips
Next, we will be creating the drips in Illustrator. Of course you can do this in Photoshop but for me it's easier to do it in Illustrator. Grab your Pen Tool (P) and mimic the curves and drips that I have made in Illustrator. At this time it doesn't matter what color you make the drip because when we transfer it over to Photoshop we will change the color.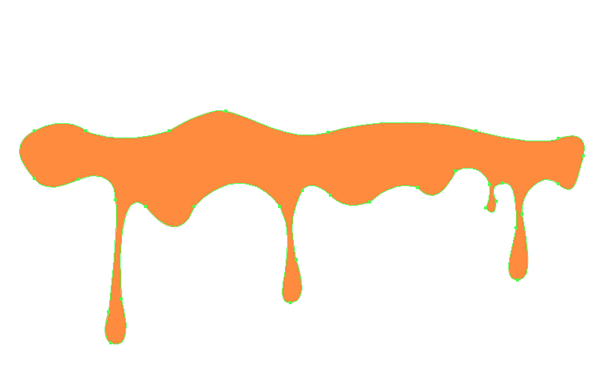
Step 8 - Transfer drips to Photoshop
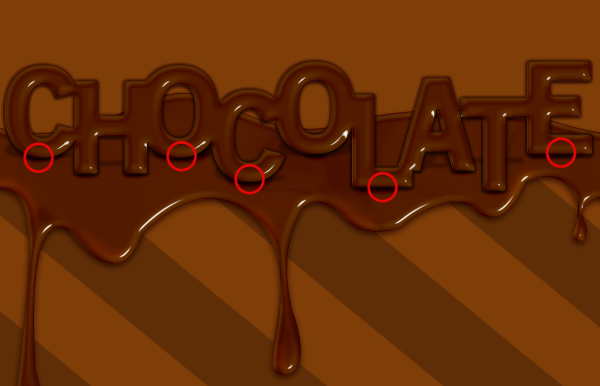
Transfer these drips over to photoshop by 'drag and drop' or save it and open it up in Photoshop. Once you have placed the drips in Photoshop, 'rasterize' the layer (right click on the layer > rasterize) and name it 'Drips'. Soften the areas of the drips with a soft round brush. In the image below I have circled the areas in red that have some areas that need to be softened.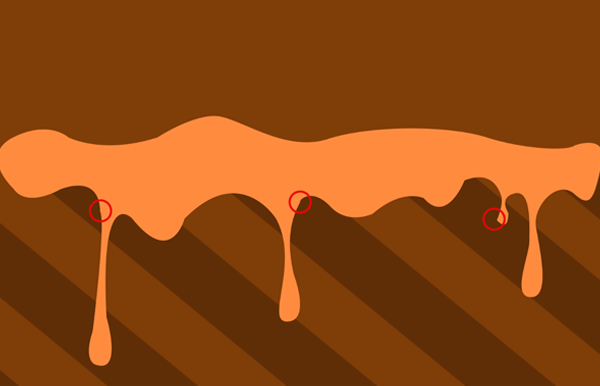
Step 9 - Duplicate Layer and add Layer Styles
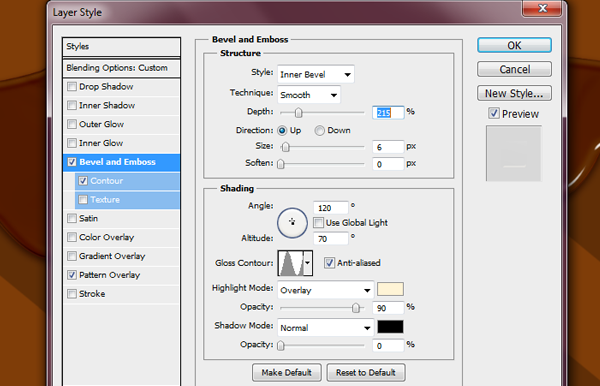
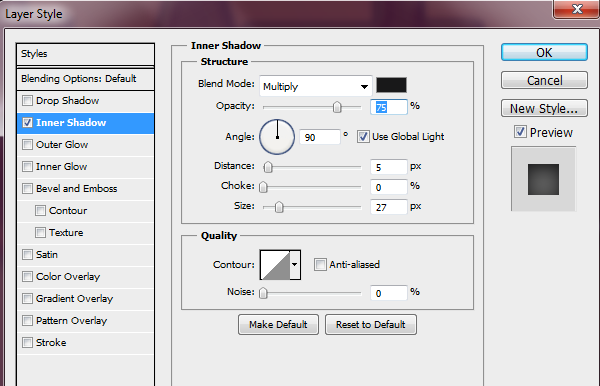
Duplicate your 'Drips' layer three times. On the original layer, makes sure that the 'fill' is at 0% then double click the layer so that the Layer Styles dialog box pops up and apply these settings. For the Inner Shadow I used #22190a.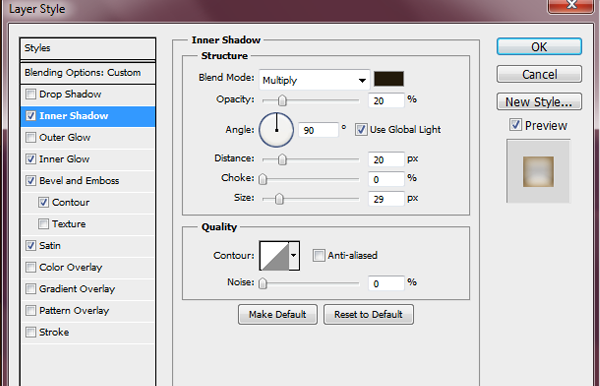
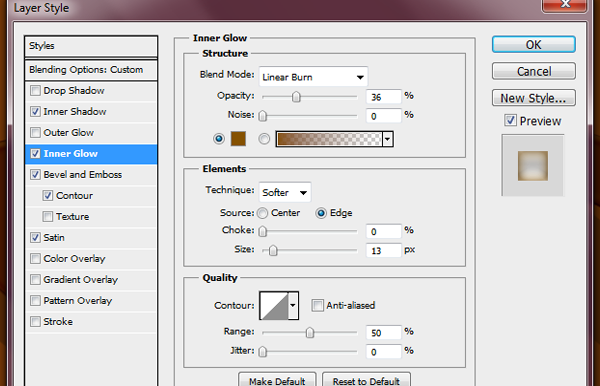
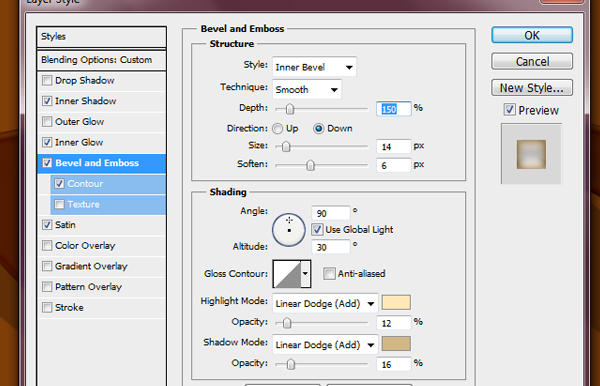
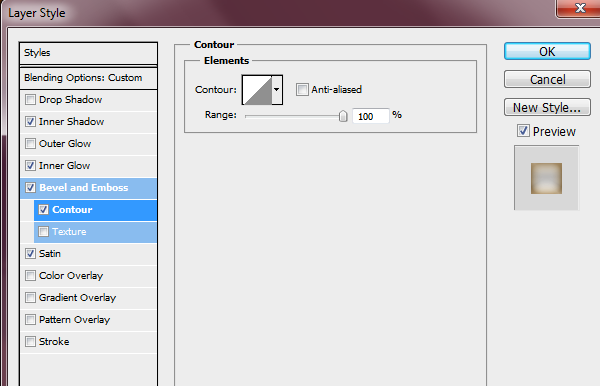
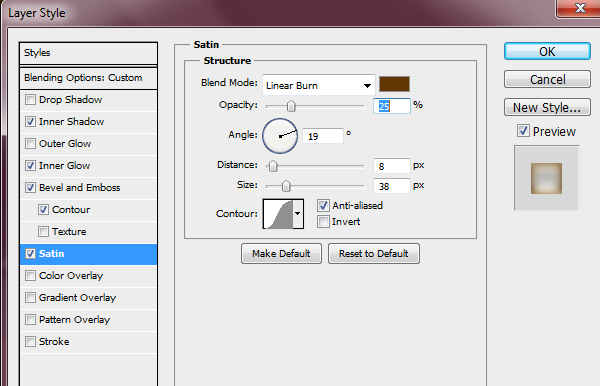
Step 10 - 2nd Drips layer
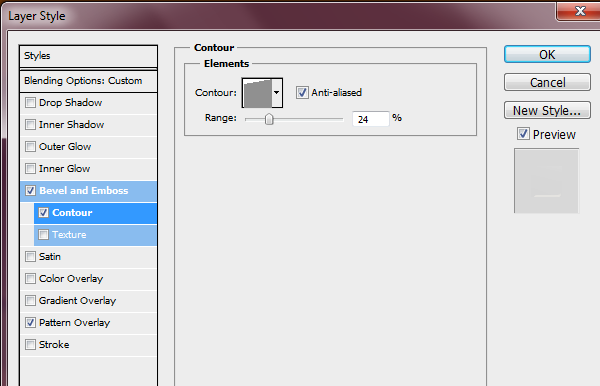
If you've done everything right this is how it should look so far. Go on to your 2nd Drip layer (which should also have a 'Fill' of 0%) and add these layer styles.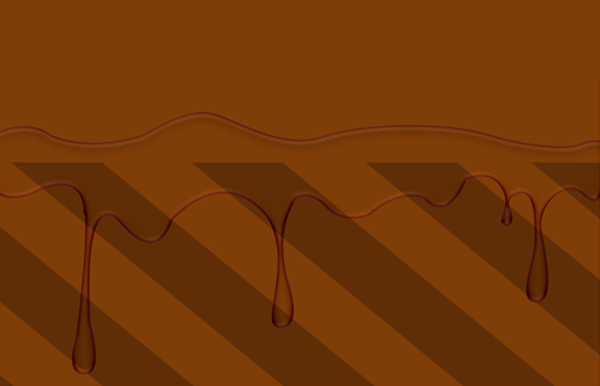
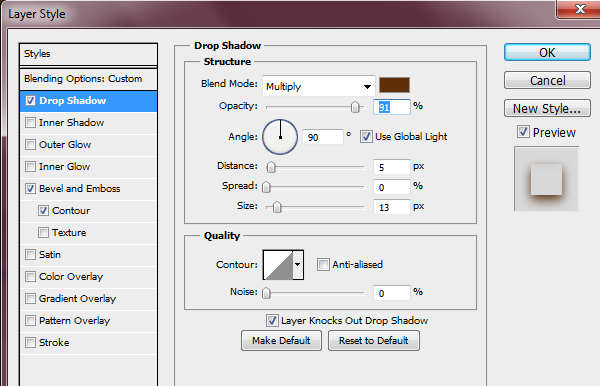
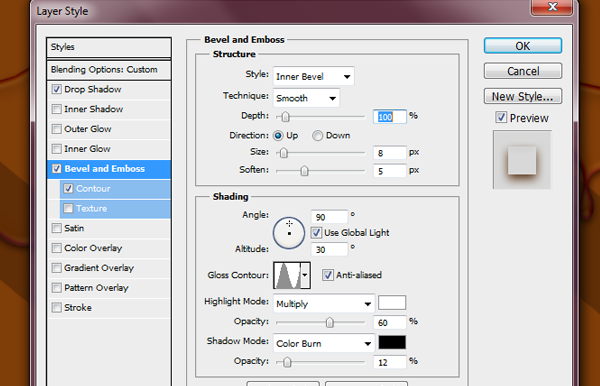
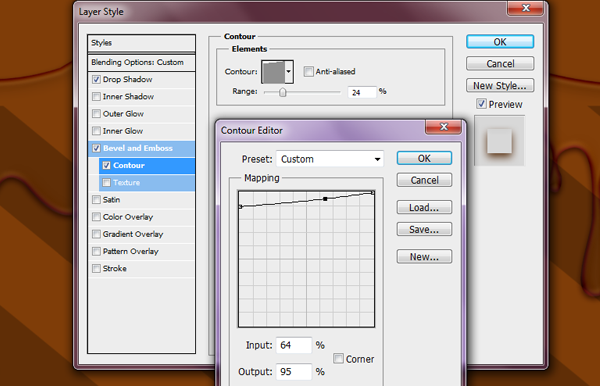
Step 11 - 3rd drip layer
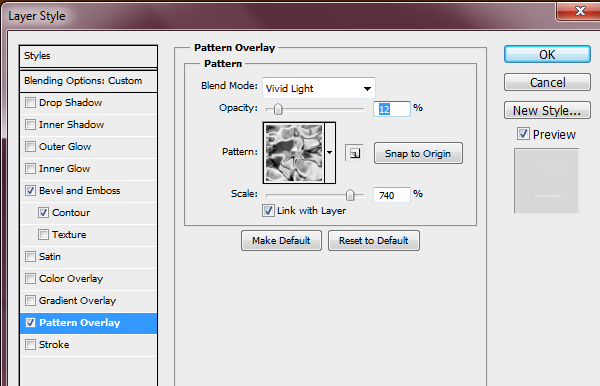
Add these effects to your 3rd layer. Inner Shadow #000000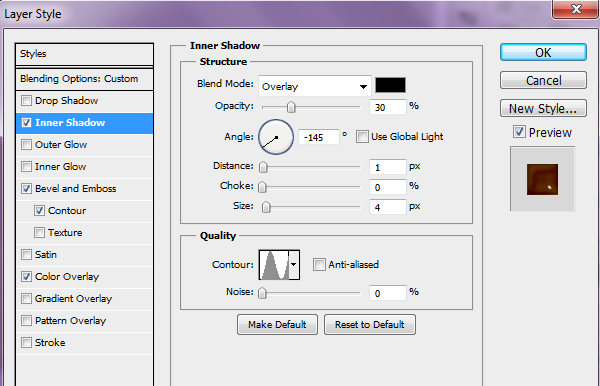
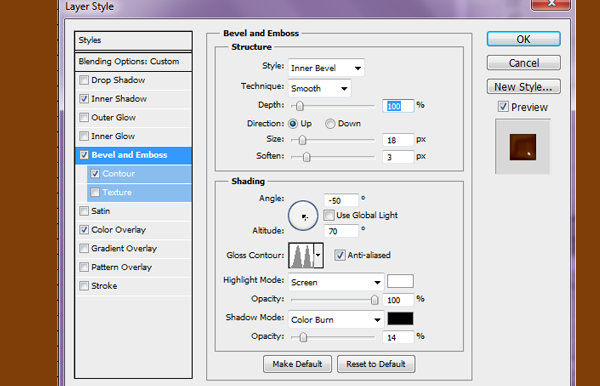
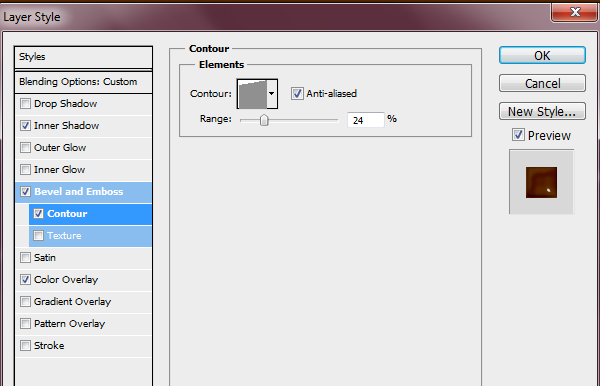
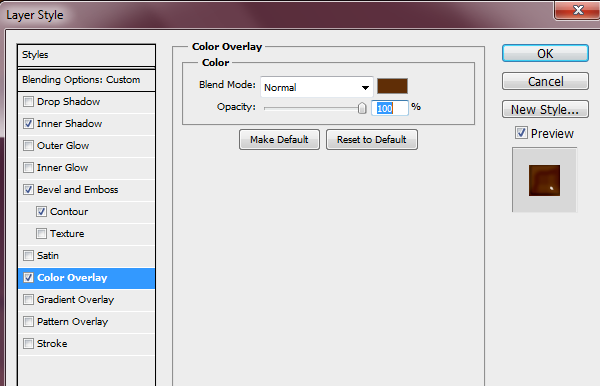
Step 12 - Last Drip layer
This is how mine looks at this point. Continue to add these settings to the last drip layer.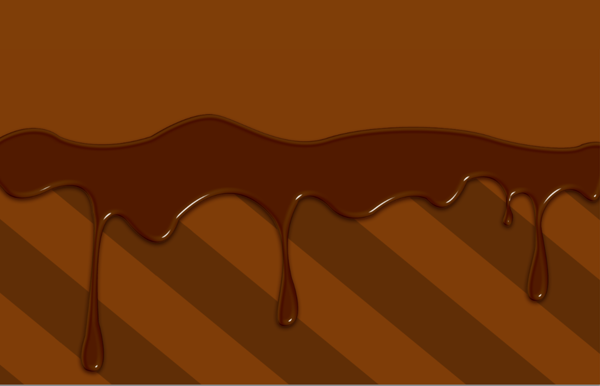
Step 13 - Highlights
Create a New layer (above your Drip layers) and name this layer 'Highlights'. Grab your Brush Tool and select a soft round brush with a size of 12px and a color of #ec9f04. Then on your 'Highlights' layer brush in some highlights in different areas of the drips.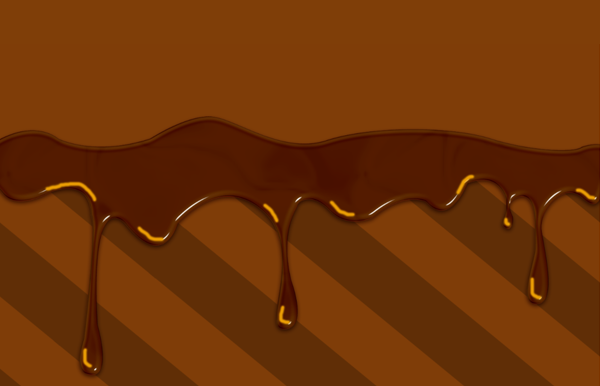
Step 14 - Blur Highlights
Once you have brushed in some highlights like the image above. Go to Filter > Blur > Gaussian Blur. Once you've done the Gaussian Blur change this layer to 'Soft Light' with an Opacity of 70%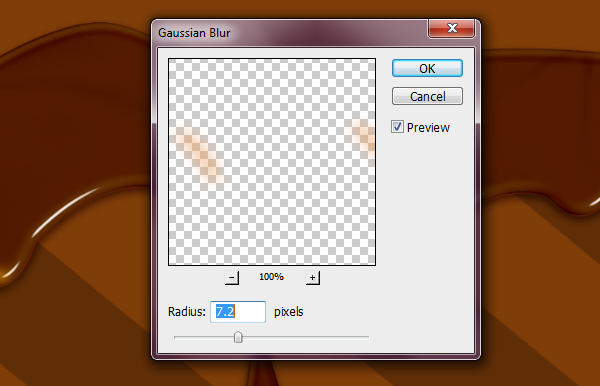
Step 15 - Smudge Highlights
Take your Smudge Tool (size 50px and a Strength of 50%) and smooth out your highlights. So that it looks like the picture below.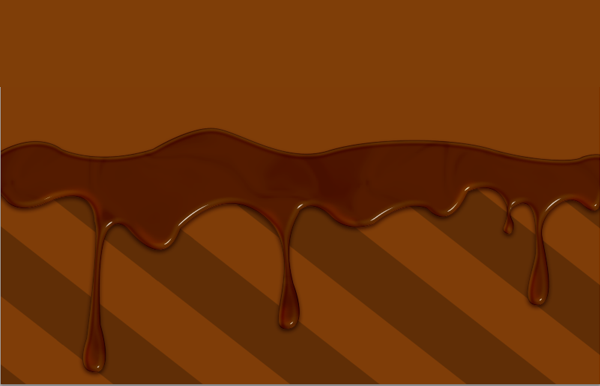
Step 16 - Chocolate Text
We are now done with the chocolate drips! Time to move on to our text effect. The font that I will be using for this tutorial is "Old Sans Black". I attached a link at the beginning of this tutorial for you to download. For my text I typed out each individual letter and line them up so that each letter touched one another. Once you have typed out each letter, rasterize each letter and merge the letter layers. You can name this layer 'Chocolate' or whatever you like.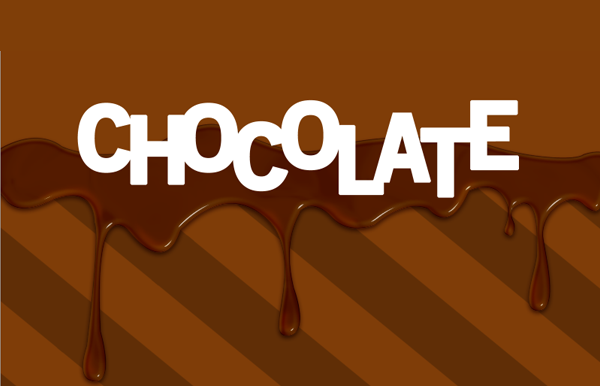
Step 17 - Chocolate Layer Styles
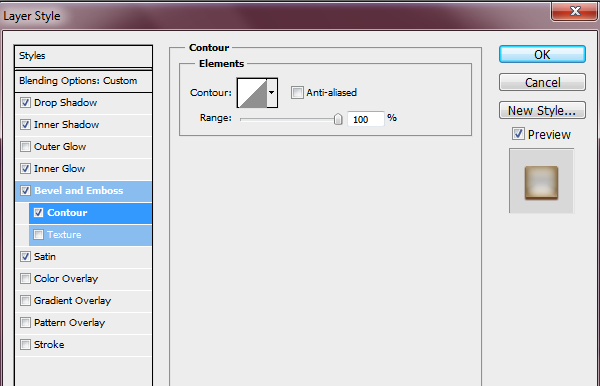
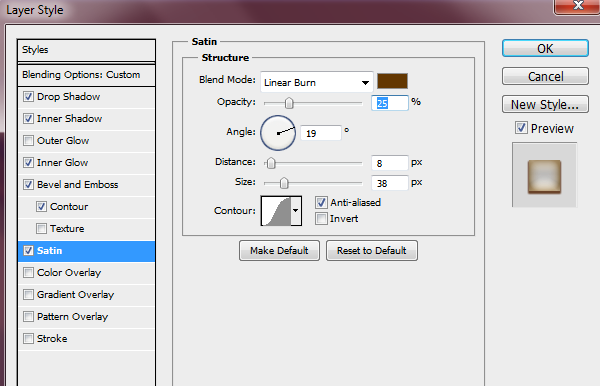
Duplicate this text layer four times. Make your top 3 'Chocolate' layers invisible by clicking the eye icon next to the layer. On your first 'Chocolate' layer add these Layer Styles. Make sure the Fill on this layer is at 0%. The image below is how your first 'Chocolate' layer should look once you apply the layer styles.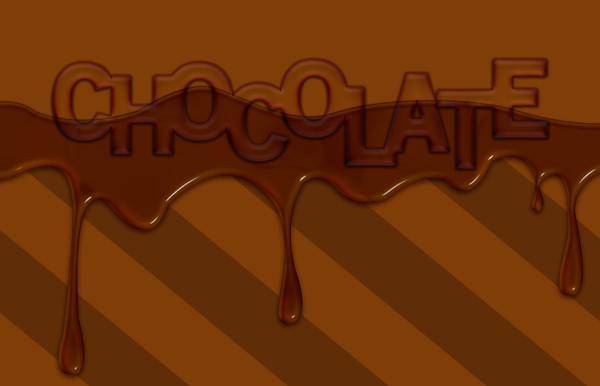
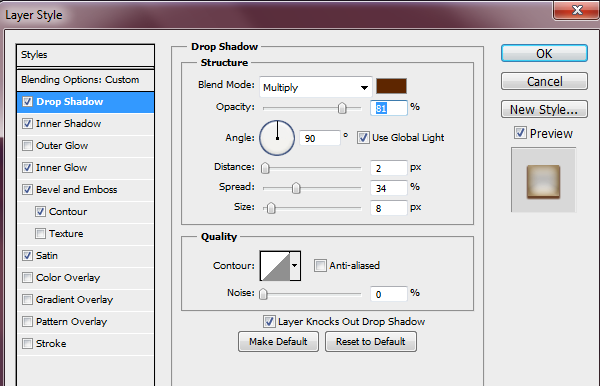
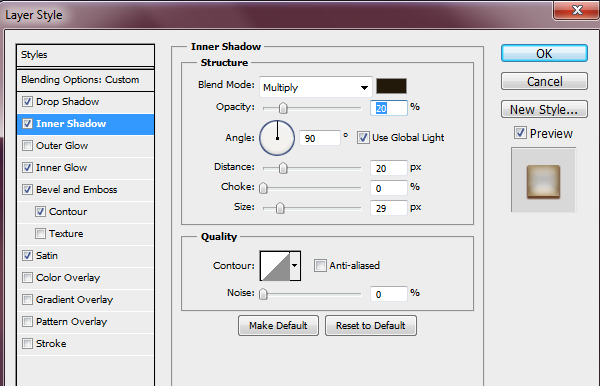
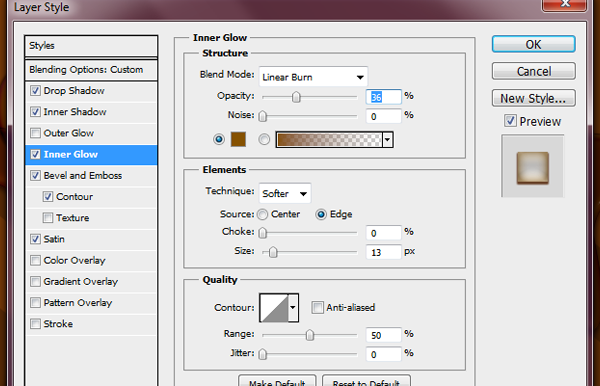
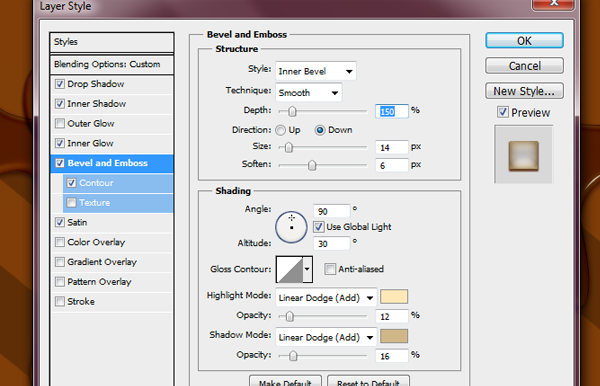
Step 18 - 2nd 'Chocolate' layer
Make the 2nd layer visible by clicking the box next to the layer and apply these settings. The Fill on this layer is also 0%. Drop Shadow #602e06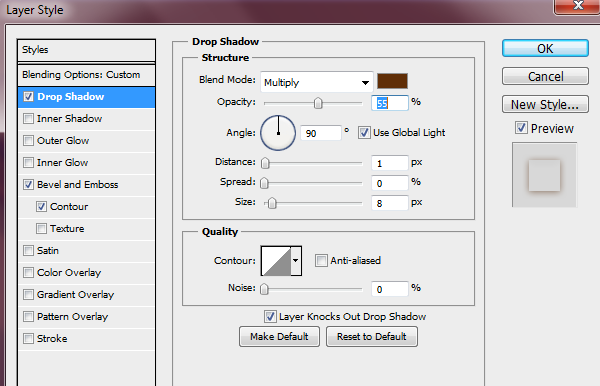
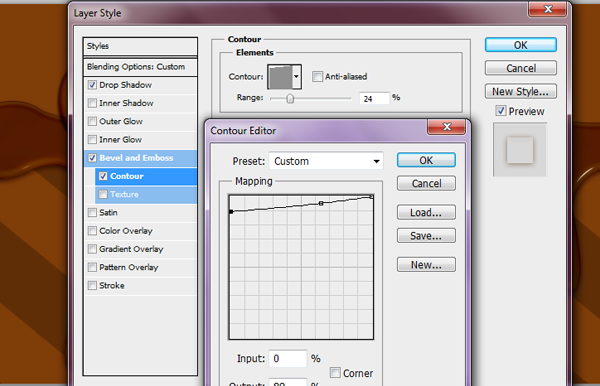
Step 19 - Third 'Chocolate' Layer
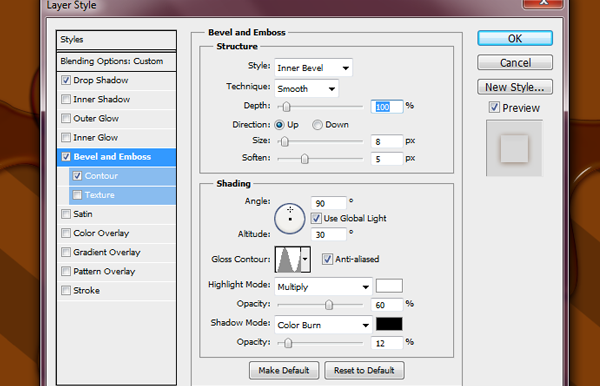
This is how your text should look so far. Make the third layer visible and apply these settings to this layer. This layer also has a 'Fill' of 0%.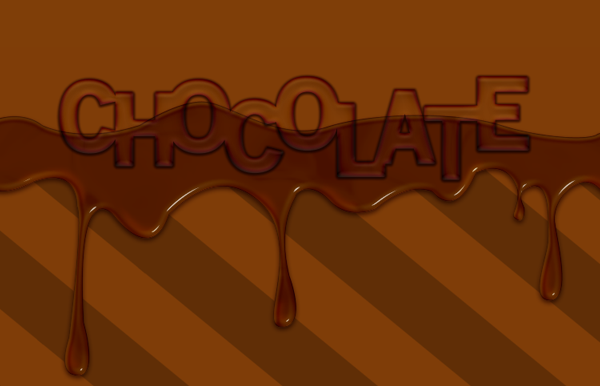
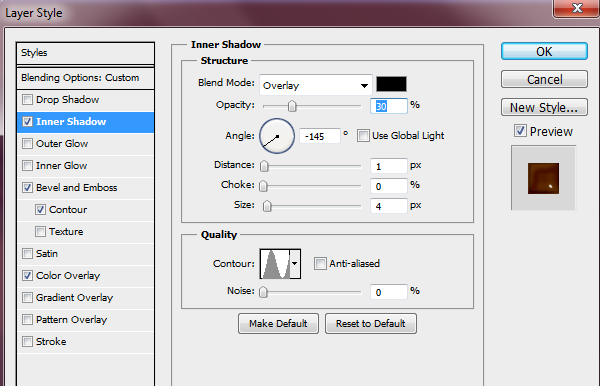
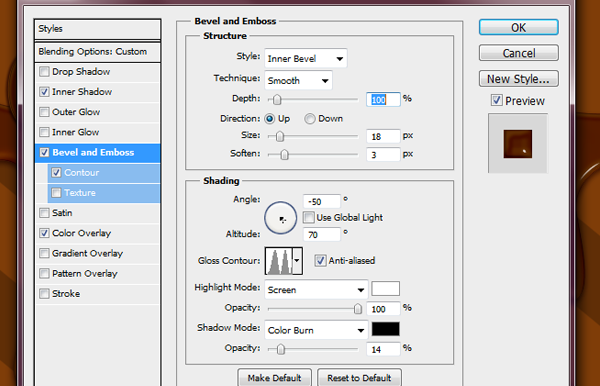
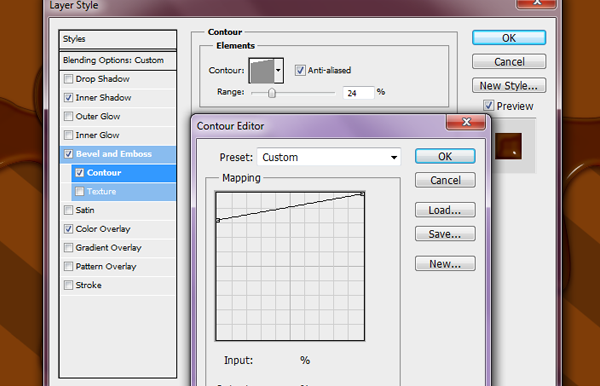

Step 20 - Text Reflection
This is how your text should look. Now we will add the reflection. Now on your fourth 'Chocolate' Layer (make it visible) bring up your Layer Styles and change the Color Overlay to Black #000000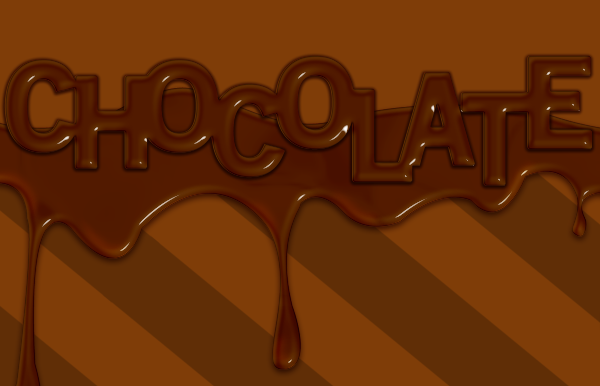
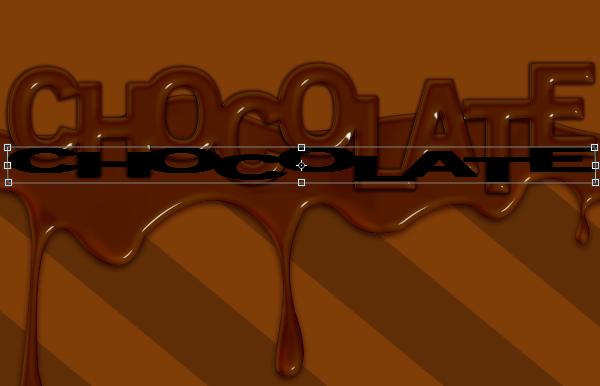
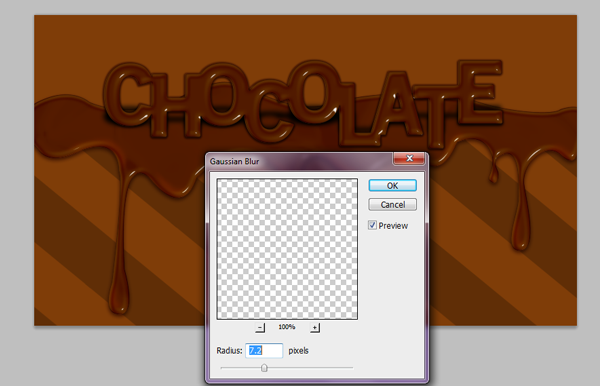
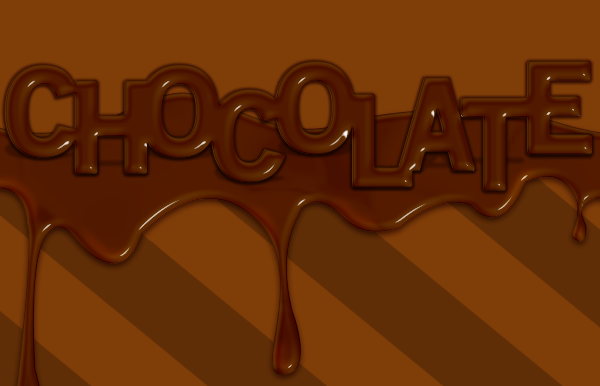
Step 21 - Cherries on Top
Now we are done with the that! We are almost finished, hang in there with me. Time to add the cherries. First create a New Layer and call it 'Cherry' make sure that this layer is above the 'Chocolate' text and 'Drips' layer. Grab your Brush Tool (a Hard Round Brush, I used 97px brush) and place it wherever you like on your canvas. #f50000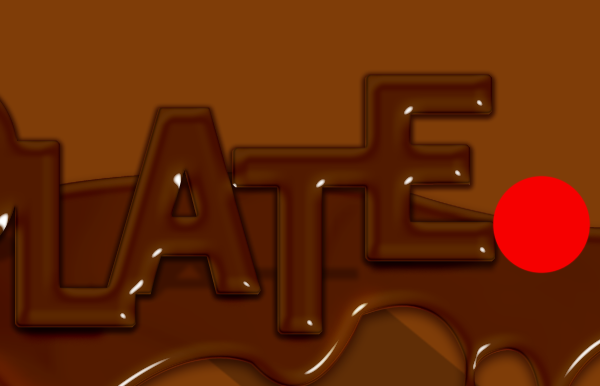
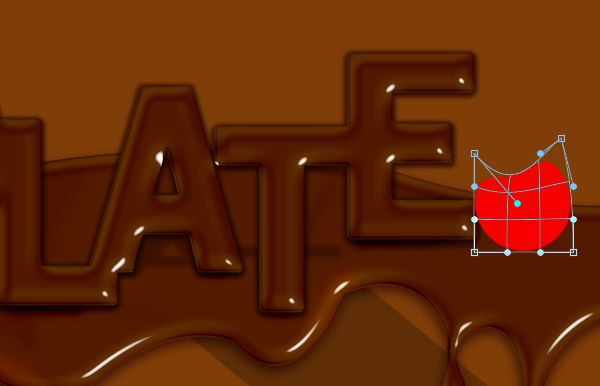
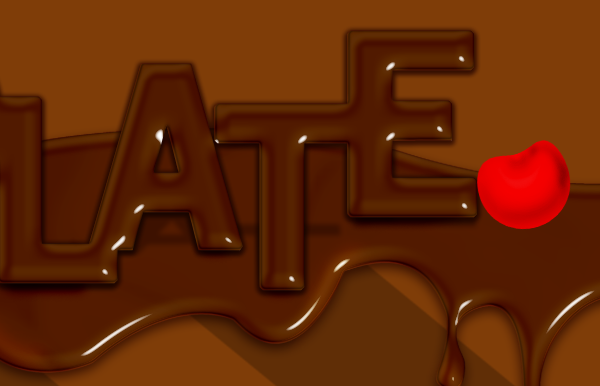
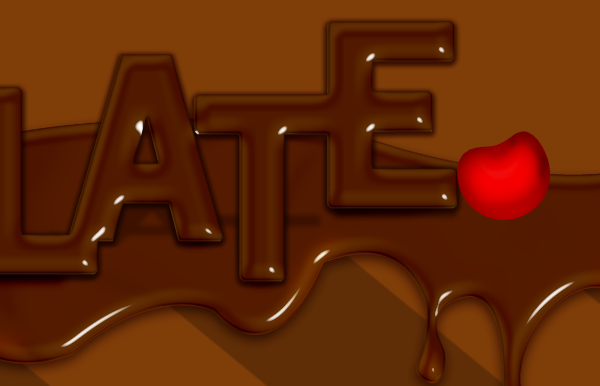
Step 22 - Time to make this cherry shine!
Create a New layer on top of your 'Cherry' layer and name this layer 'Shine.' Grab your Brush Tool (27px soft brush #ffffff) and make a circle motion on this 'Shine' layer. Put the Layer Opacity at 48%.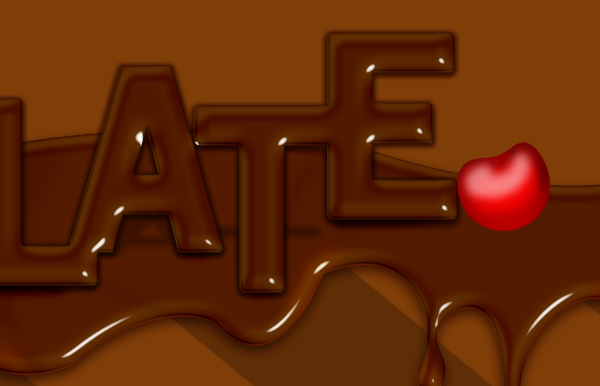
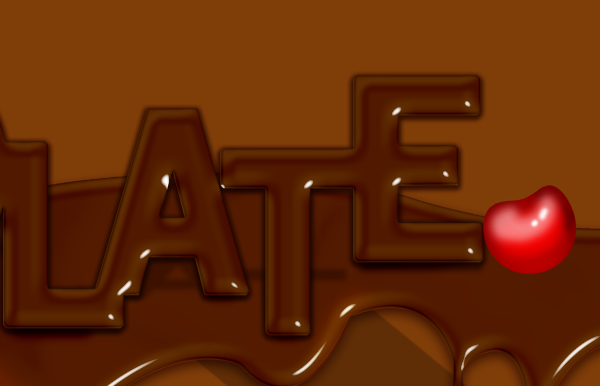
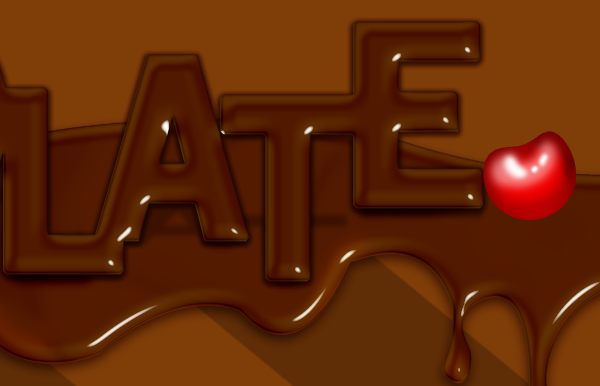
Step 23 - Add the Stem
Create a New Layer and name it 'Stem.' Grab your Rectangular Marquee Tool and make a rectangle on your canvas. Once you have done so fill it with #109b01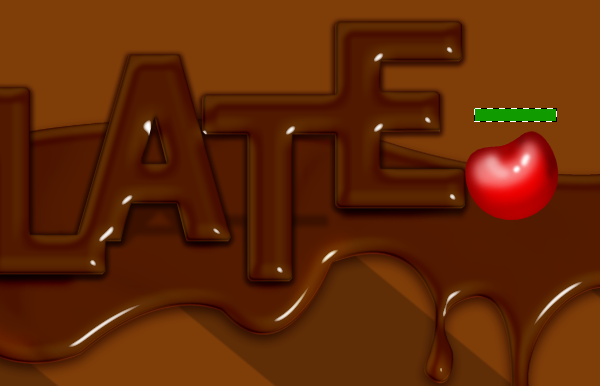
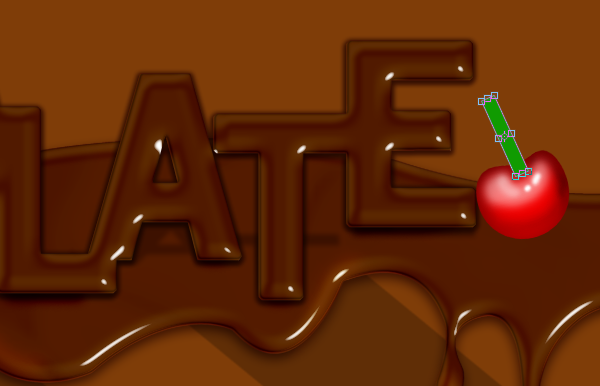
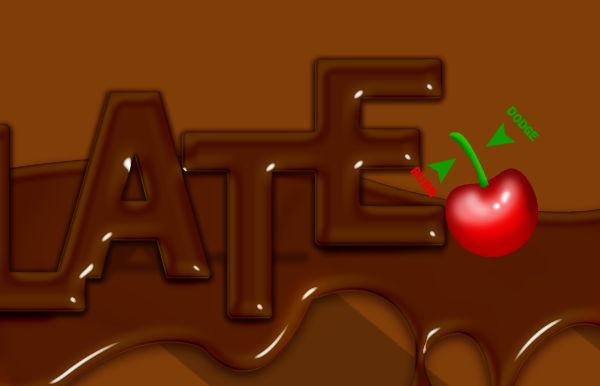
Step 24 - Let's Add One More Cherry
This is how it looks so far but I think it needs one more cherry.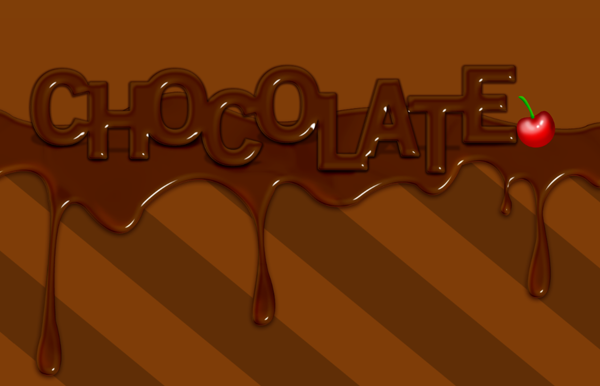
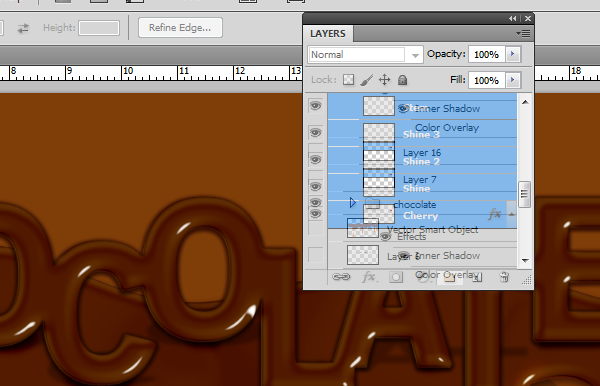
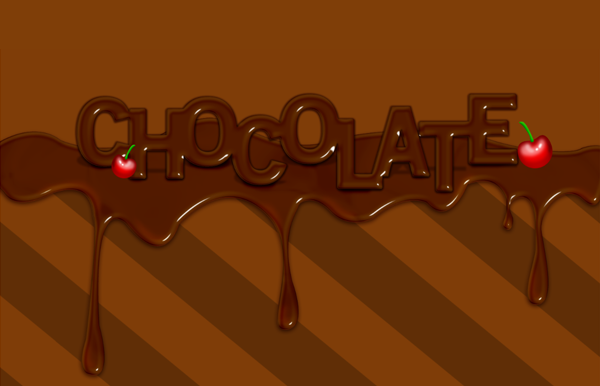
Step 25 - Almost Finished!
Go back to your 3rd 'Drips' Layer and grab your Burn tool and place it under the areas of the cherries. Then you will be done my friend!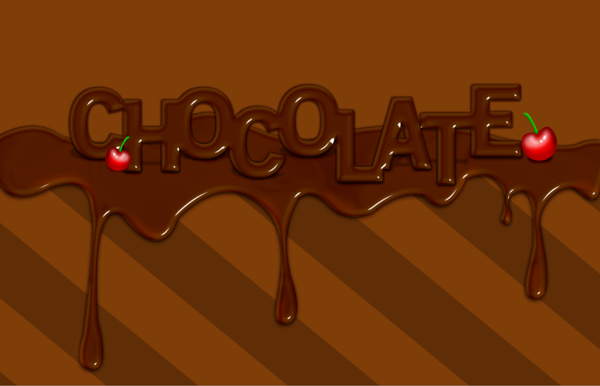
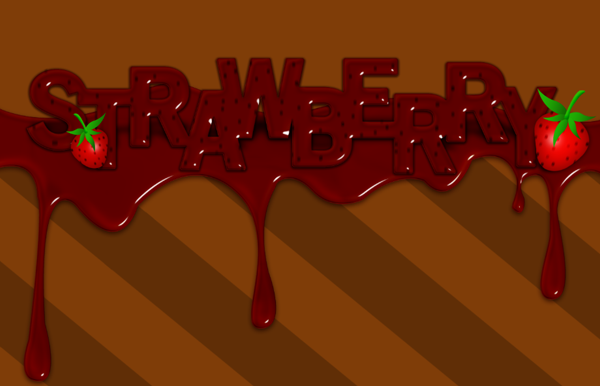
Final Results
![final-results[1] final-results[1]](http://photoshoptutorials.ws/aa6ab30268b3_124DA/final-results1.png)

No comments:
Post a Comment